Sitecore
Creating your first JSS React application
Friday, January 29, 2021
Layer One - Sr Director of Software Delivery - Phil Busch
Introduction
This blog post will guide you through creating your first Sitecore JSS app. We'll be using React, but Sitecore JSS also supports Angular and Vue. Before you get started with the installation, check out our previous post on Sitecore JSS.
Install JSS CLI
JSS CLI is used for scaffolding new JSS websites, and is critical to the development workflow. You'll need to executenpm install -g @sitecore-jss/sitecore-jss-cli to globally install the JSS CLI tools.
Once this completes, you should be able to execute jss on the command line, and see the following output:
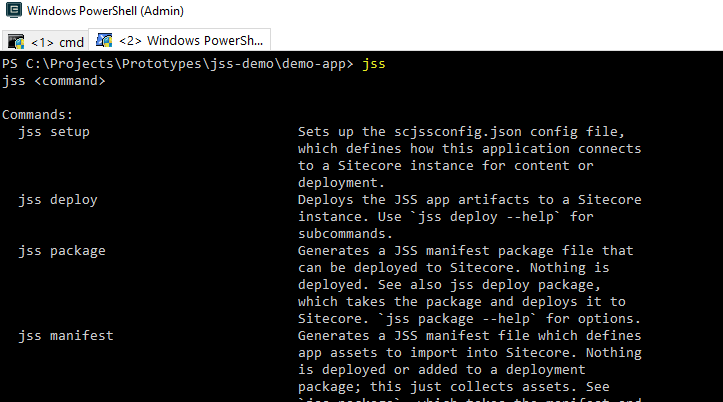
The output defines all the globally installed commands that are now accessible to you.
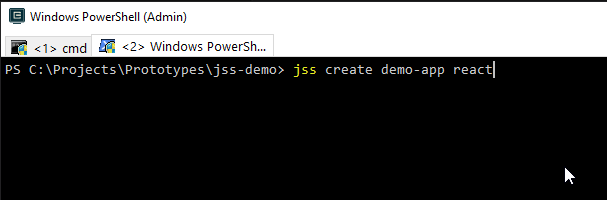
Create the application
To create the application, we use the jss create command. This command allows us to set the name of the site, and choose the single page application framework we'd like to use. Let's create an app called demo-app using the React framework by executing the following command:
jss create demo-app react
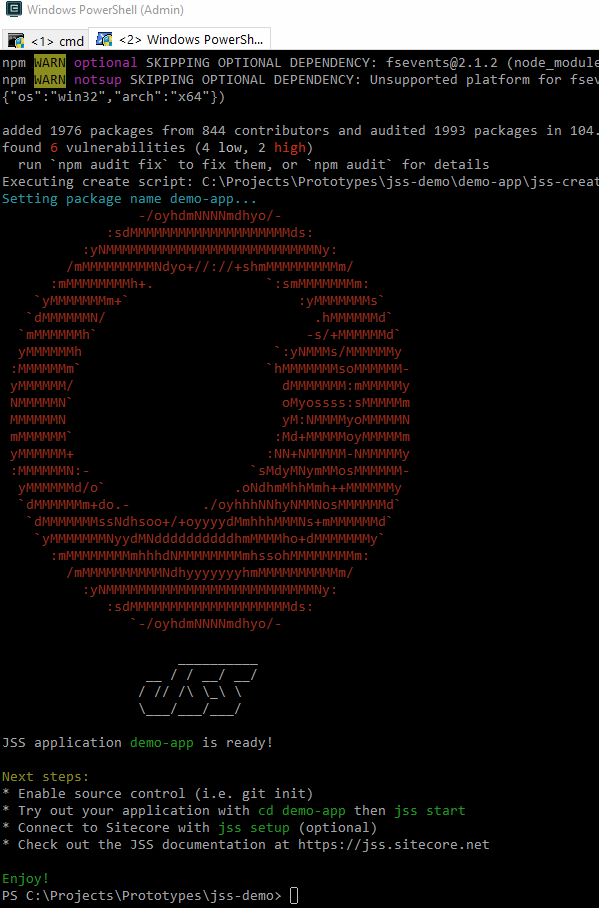
This command downloads templates from Sitecore JSS's GitHub, install relevant npm packages, and scaffold a new React application. Once all is completed, you'll see the following output:
Disconnected mode
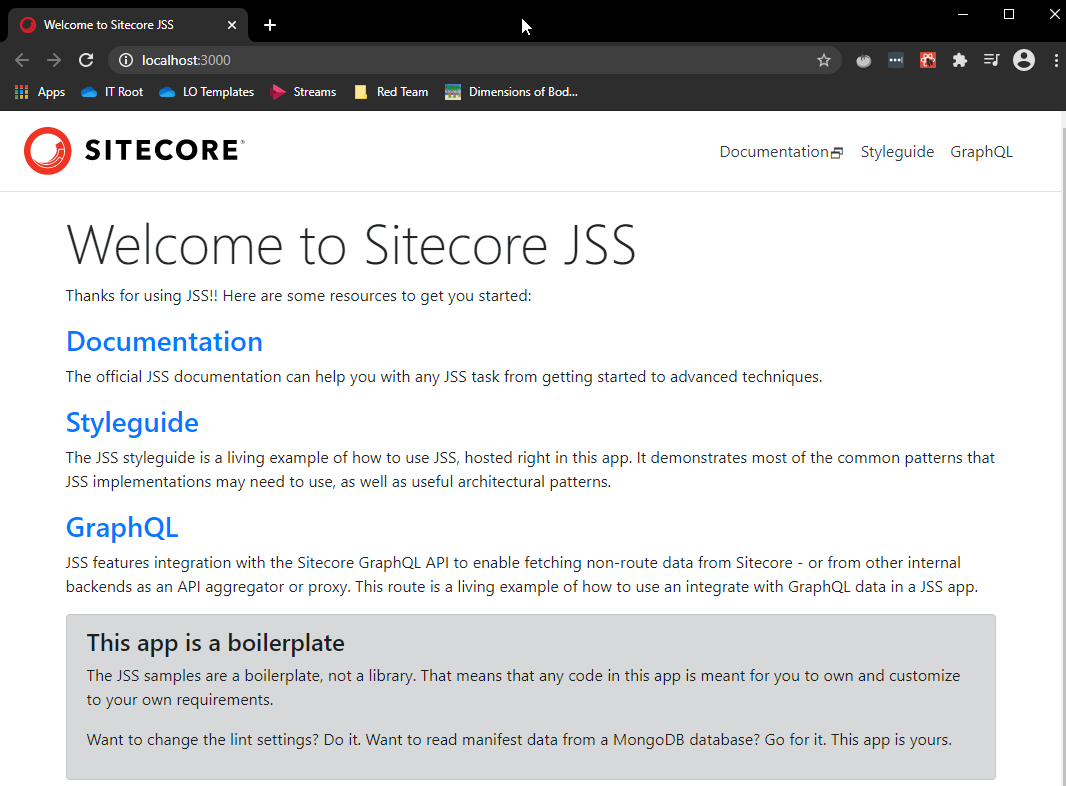
At this point you will now have a folder called demo-app. Navigate to it by executing the cd command. Then execute the jss start command. In executing this command, you are starting JSS in disconnected mode. Disconnected mode starts a small webserver that hosts the React application from the files in the directory. At this point the React application does not know that a Sitecore instance exists. So the the data configured by the content editor is not present and has to come from a different source. Of course the Sitecore JSS team has solved that issue. Within the demo-app directory created a child directory data was also created. This directory contains folders and yml files. Where the yml configuration files represent mock data that would be coming from Sitecore in a hosted environment.
Depending on your development workflow. You may stop the JSS installation here. With this setup, a front end developer would be able to successfully create new components for the Sitecore site. Add mock pages to their data directory. In essence, creating a prototype that could quickly be connected to a working Sitecore instance or deployed to a Sitecore environment.
Connected Mode
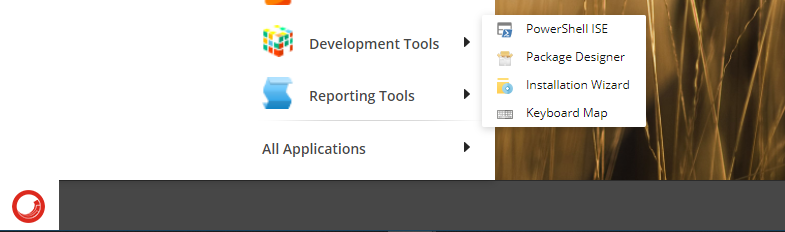
Connected mode, differs from disconnected mode in one major area. The source of the data consumed/presented by the React application. In connected mode, the data source is a real live Sitecore instance. First, we must install the JSS Sitecore package. This you can get in from the Sitecore developer portal. The installation is a simple Sitecore package. You can find the package installation wizard logged in as a Sitecore admin under: Desktop > Sitecore Icon (start menu) > Development Tools > Installation Wizard. Once open, upload the JSS .zip file, and step through the wizard.
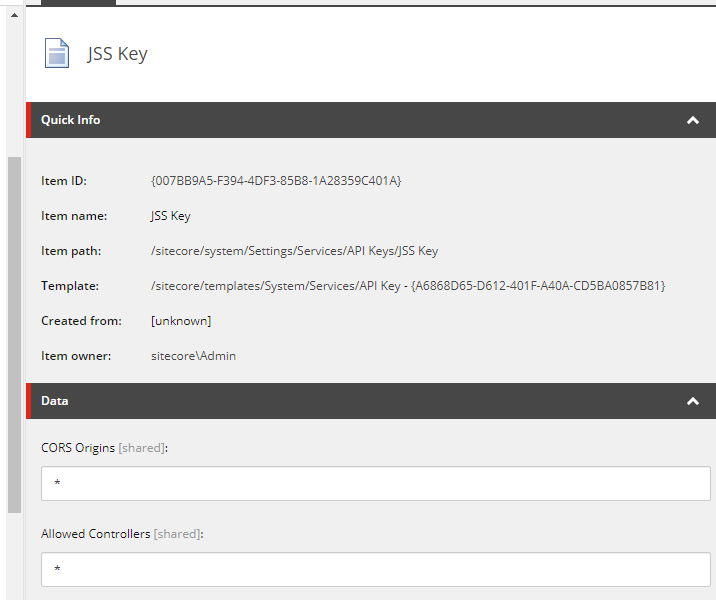
Then, you will need to create an API key. API keys are managed under /sitecore/system/Settings/Services/API Keys/, add a new child to that folder. The name should be descriptive of the use case. Then set the CORS Origins and Allowed Controllers values to *. Copy the Item ID of this new key and put it somewhere easy to access. We will need it when configuring the React site.
Next, we will go back to execute the command jss setup. You will be asked a series of questions from this command. Such as:
- The installation folder of Sitecore
- Sitecore hostname
- Url of the JSS import service
- The API key to use
Integrated mode
This mode of operation is similar to that of a traditional Sitecore installation, thinking ASP MVC site. Where the server use to host the React application is simply the server Sitecore instance is currently running on. The work needed to set this mode of operation up was completed as part of the connected mode setup. Specifically, the execution of jss deploy app -c -d. This command took the React application, compiled it into a distribution directory. Then using the JSS import services, created a dist directory in the Sitecore instance's folder structure to host the React application from. To test this out, you can simply navigate to the URL of the Sitecore instance. You will see the same presentation that appeared when running the site in both disconnected and connected modes.
At this point you now have a working installation of Sitecore JSS. In our next part of this series we will see what the development flow is for creating your first component.
Interested in learning more?
Contact Us